在新西兰
怀孕19周了,原来所有的裤子都穿不上了。今天去逛EGG,想买条孕妇裤。
样子挺土,价格不菲哦。。看上的一条牛仔裤,159一条呢。
看样子其实蛮简单的,想想完全可以把原来的裤子改造一下,就可以自己做出来的。
于是花了不到几块钱,两个小时时间,搞定一条。挺有成就感的,拿来跟姐妹们分享一下!最后成品是这样的,以后如果能减肥成功,还可以改回去,变回普通裤子穿。


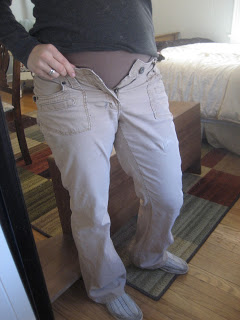
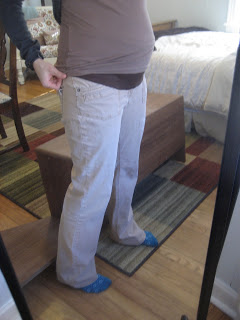
孕19周的肚子,腿没变粗,腰围原来越大,水桶腰啊。。。裤子还差十几公分才能扣上

材料很简单,针线,松紧带(两元店买的,一大盘才两块钱),不用的T恤(我用它做过别的物件,剩下的一块)

牛仔裤沿着裤线位置,从腰部剪开,大约和裤子拉链的长度一致。

布剪成这样形状的两片,斜边长度和上面裤子剪开的长度一致


上面直边的位置,折起来,手针缝两道线,外面的部分针脚小,里面看不到的位置,针脚可以大些。

剪两段松紧带,长度和折起来的部分一样。

把松紧带穿进两道线之间,两个通道都穿,这样双道的松紧带看起来比单道的好看,弹力也更好些。

最后做出两片这样的物件来

把它们缝在牛仔裤剪开的部分上,如图。

最后成品是这样的


真人展示一下哈。。


因为有松紧带,还有可发展空间

盖上衣服,完全看不出来了。。。

呵呵,终于有裤子穿了,因为原本就是自己的裤子,穿着很舒服的。
评论
不错不错,喜欢看DIY,等继续、~
评论
等看成品图~~~~~~~~
评论
顶妮妮...........太有才了.......
评论
成品出来了,已经穿上了,很舒服啊
评论
我刚刚去买了一条,跟弹力裤差不多的。还要70刀呢。楼主太有才了。
这边的裤子要不就肥的两条腿都能塞进去,要不就是价钱太贵,性价比不高。还是夏天好啊。
评论
好厉害啊。。。。。。。。。。。。
评论
是啊, 夏天穿裙子就可以了
评论
LZ 太厉害了,值得学习学习。
评论
楼主真厉害
评论
好厉害~~~~~
评论
佩服佩服。。。
评论
学习起来以后用!人民有智慧啊,牛!
评论
太厉害了......
评论
给力啊,哈哈~
评论
很有创意。LZ很厉害
评论
不是我的创意,
是 EGG的样式, 我只是COPY。
评论
楼主太强了,手太巧了,羡慕!
评论
心灵手巧啊。
评论
楼主太厉害啊。。。。
评论
Friday, April 22, 2011New Maternity Clothes, Please! Stretch Pants
"Sometimes, when you are a man...you wear stretchy pants...in your room...it's for fun."
I was able to get this project finished before the big move, which has been nice because I've been able to enjoy these bad boys most of my pregnancy.
This was a pretty easy alteration, and pretty straight forward. Truth is, I miss stretchy pants from the 80's, and had been wanting to get my hands on some for awhile. Then, while spending countless hours on my miserable back during the first + trimester of pregnancy, the thought occured to me... why not alter some black stretchy workpants from my first pregnancy??? Though my pregnant brain was fried with hormones and I forgot to take pictures before and during the process, I have conveniently illustrated as best I can the process for alteration. This process would work for altering flare jeans into skinny jeans as well, but make sure you use heavy duty needles and thread!
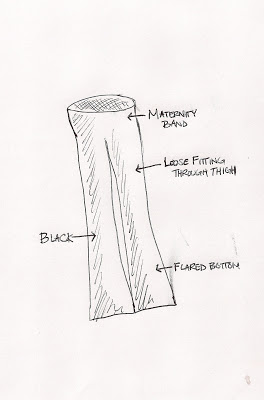
Here is a representation of what the pants looked like before: just your standard black, stretchy maternity workpants. Convenient, but plain.
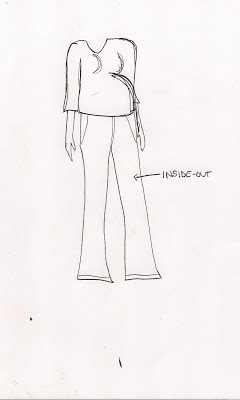
The first thing you want to do is to turn them inside out and put them on. Decide how tight or loose you want them.
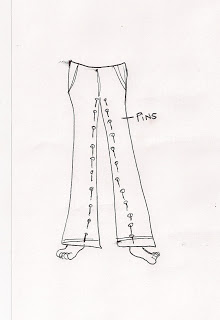
After you have a feel for where you want parts taken in, pin the pants in a vertical pattern so it creates an outline of where you want to sew. Remember, you should still have your pants on.
Take your pants off carefully, I think I got stuck a few times in this process, but I did rush it. If you're not home alone, it might be a good idea to replace them with another pair of pants.
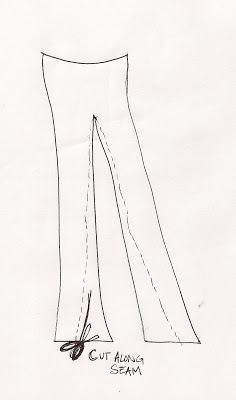
Sew along the pin line, removing pins as you go, so you can sew in the exact area of the pins. Reinforce your hem to your preferrence.
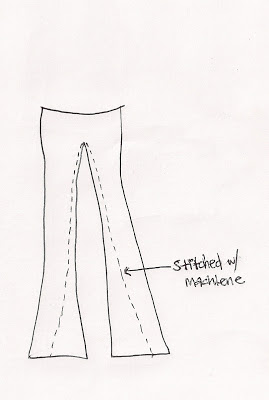
Do this for both sides, and cut the excess fabric off as close to the reinforced seam as close as you are comfortable with.
Turn pants back right-side out, and you've got yourself some genuine 80's stretchy pants to comfort your growing body (or regular body) during pregnancy!
This isn't supposed to be a belly shot, but sometimes I like to emphasize that it is actually a baby there, and that I'm not just a super-sized Sarah in a mu-mu.
And isn't it kind of nice to focus on something on your body that isn't quadrupling in size?? Well, I guess at least from the knees down...
评论
DIY Maternity pantsSeptember 21st, 2009
[size=85%]
[size=85%] Wearing: totally awesome Cellini loafers from Zomp!!! Obviously this is NOT a mommy style post as I would not wear this outfit out, but I can’t help telling you how much I LOVE these loafers!
[size=85%]
Sooooooooo I had a tragic realisation recently. Last time I was pregnant it was summer. So my maternity wardrobe consists of flowy dresses, cute tops, skirts and shorts… not really appropriate for an Iowan winter hey?!
Of course I’m a little irritated by this. For some reason last time I thought I was making a one time maternity wardrobe purchase and that I wouldn’t ever need to do it again (naive I know). And now I need a winter maternity wardrobe? Oh the frustration!
I know I will probably have to buy a few things, but I’d like to try and make as much as possible as my fabric stash is huge and my budget is… well not!
The first project I decided to take on was a pair of maternity pants. I love these corduroys. They’re a hand me down from my SIL and I LOVE THEM, they’e super comfy and so warm. Unfortunately I ripped the waistband really severely last winter making them unwearable, so I’m really happy that I’ve found a way to salvage them!
This was a really really simple refashion/ DIY kind of thing if you’d like to do it yourself. I know there are a lot of tutorials out there on how to sew an overbelly belly band onto a pair of jeans, thus creating maternity jeans. Personally I don’t see the point. For one thing the type of spandex used in retail maternity clothing for over belly bands is incredibly difficult to find, and regular jersey just really doesn’t have the strength to hold up a pair of pants, and secondly I find the overbelly style of maternity pants super frustrating. Due to their design you can’t really use them in the first few months of your pregnancy when your belly is too big for regular pants but too small to hold up a giant piece of spandex. As a result I only wear the under belly style of maternity pants as these can be worn at any stage and the stronger elastic it uses holds your pants up better (I am not a fan of pants that constantly travel south!).
So here’s what I did:
- I cut off the waistband of my pants. I carry my babies very very low meaning that I have some maternity pants I’ve never worn because the crotch is simply too long. So I cut the front of my pants much lower than the back to compensate for this. (In fact now that I’ve finished the pants I wish I cut them even lower in the front for a better fit, but you live and learn!)

- Next I very carefully cut out the zipper. The reason for this is that most jeans/cords have metal zippers which no sewing machine can handle sewing over, so it needs to go bye bye.
- I then sewed closed the fly, as now that there was no zipper there was an opening.
- I then cut my elastic. This is very wide 2.5″ waistband elastic – I chose it based on it’s thickness (the thicker the elastic the less likely it is to cut into you) and also it’s stretch was the closest I could find to my retail maternity pants waistbands. I cut my elastic a few inches shorter than the waistband so that it would help out my pants up! I also cut some jersey to cover the elastic and be soft against my skin (I don’t like the feeling of elastic against me, it’s itchy!). I cut my jersey the same length as the elastic and double the width. You may choose to add on 1.5″ to the width of your jersey fabric if you do not want to sew the elastic to the actual pants. My elastic has a handy bit on the edge for the purpose of being attached to the clothing, which is why I didn’t add on extra for the seam allowance (ie my elastic is being sewn to the pants). I really like it like this as the elastic won’t twist.
- I then matched up the edges of the elastic and sewed, and did the same for the jersey

- Encased the elastic in the jersey. Note that I did not line up the seams of the jersey and elastic exactly. The reason for this is that once I sew all this together it’s going to be very thick (remember that denim and corduroy are very thick and have thick seams) and I don’t want my machine to die!

- Then I sewed the elastic/jersey to the edge of my pants. Remember that the elastic and jersey are a little smaller than the waist of the pants? So I needed to stretch the elastic/jersey a little as I sewed. Don’t forget to use a Denim/Jeans needle for your machine. Don’t skimp on that part, it’s really necessary. A universal needle just can’t handle the thickness of denim and corduroy.

- I used my serger/overlocker to neaten up the edges. I know a lot of people like to use their sergers for everything. I am not one of those people. It has it’s place of course, but I really don’t think a serger could have given this waist the stability it needed, so I just used it as a finishing touch.
- Finished product!

Now as a side note, I wouldn’t normally wear these pants with such a short top, I just have in the photos for the purposes of showing you how the waistband fits.
And in randomness, there’s a little fall chill in the air, and I’m starting to dream of boots and trench coats (and pretending that winter doesn’t exist, just months and months of beautiful fall!). My next project is a maternity winter coat, as none of my lovely warm coats will fit this winter (baby is due end of february). It’s going to be an undertaking, but I’m really excited about doing some tailoring, as I really haven’t for a while. I have a pattern in mind, and i”ll update you all when I get organised!!
评论
Maternity Pants Tutorial
 Sample Pants From The Tutorial
What you need:
A pair of pants
Stretch knit material
A sewing Machine
Sew it yourself. Maternity Pants are very expensive and unless you are planning on having a LOT of kids you probably won’t be using it much. I can usually fit my old clothes for most of my pregnancy so I don’t start NEEDING maternity pants until later in the second trimester. In this tutorial you learn how to turn regular pants in to comfy maternity pants. Adding much more variety to your wardrobe for much less. She suggests buying a few cheap pairs of pants at a thrift store so you don’t turn all your regular pants into maternity ware, after all you will need clothes after baby is born. I’ve tried this tutorial and it is simple and pretty easy. I love the pictures. I always need pictures. She obviously uses a Serger to do her ends, but I used a traditional home sewing machine and alternated between straight and zigzag stitches. So far I’ve transformed two pairs of old pants and it turned out great with minimal frustration

评论
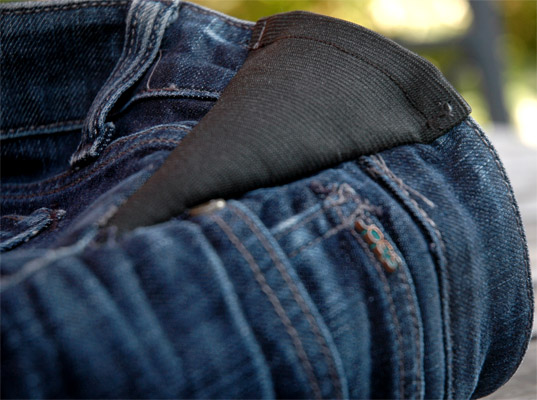
The expert seamsters at Denim Therapy, which specializes in patching up worn and ripped jeans, can insert expandable side inseams into your favorite pair, so they stretch as you (and your bebe) grow. Then, when you’re ready to get back to fighting, pre-pregnancy form—no rush, ladies—Denim Therapy will restore your jeans to their original condition at no extra cost.
+ Denim Therapy
For another take on these green jeans, as well as more ways to green your pregnancy and beyond, drop by our (kid) sister site, Inhabitots.
READ MORE AT INHABITOTS >


评论
DIY Maternity Pants
When my sister announced plans for her snowy outdoor mountain wedding, I went into overdrive going through closets and boxes trying to see if anything Alex had was suitable for hanging outside in the cold for hours. I thought I had hit paydirt when I stumbled upon a new pair of corduroys and a pair of homemade babylegs from before we moved to south Texas. I was still basking in my victory when I realized that my husband and I hadn't figured out what we were wearing.
Cute husband was leaning towards his suit, until I reminded him that 20 degree weather and a bonfire probably wouldn't be suit friendly. Unfortunately Alex heard him say the "S" word. Suits are Alex's addiction of choice. Jackets, ties, vests. It's almost like a PMSing woman and chocolate.
As a compromise, we settled on corduroys and suit jackets for my two main men. That just left me. The rapidly expanding pregnant woman, who could not find maternity corduroys anywhere except online. And no time to order online.
Then I had a crazy idea. What if I just converted a regular pair of corduroys into maternity cords?!
I had almost everything I needed for the project. Wide elastic, an old A-line t-shirt that needed to be thrown out, pins, sewing machine... The only thing I needed was a pair of cords. Naturally we hit up the Goodwill (I love thrifting!).
Alex hit the jackpot and found a pair of lowrise reddish brown cords that fit me everywhere except the waistband. An added bonus was they were only $1, so if my idea turned out to be a dud, I wouldn't feel like crying as much. We brought them home and got to work.
The first thing I did was remove the waistband.
The next step was the t-shirt. I cut across the top of the shirt, right underneath the arms, to make a tube. Then pinned it along the outside of the pants.
They almost look like maternity pants!
(I took the belt loops off after this picture.)
At this point I threw them through the washer and dryer. When they finished, I measured out my elastic WITHOUT stretching it. I sewed the ends together to make a circle and then placed the elastic inside my new "waistband".
I pinned the elastic to shirt, then pulled the extra fabric around the elastic to make the casing. I trimmed a LOT of the shirt off as I worked my way around.
When it was all pinned down, I stitched around the bottom of the new waistband, right underneath the elastic.
They fit perfectly! I am ridiculously excited to wear these!
**I used a pair of lowrise pants, I don't think this technique would work with regular rise pants.
评论
DIY Maternity PantsAdd comments
Feb 212011
I’m getting prideful.
Reason I say that is because I am more and more examining the way things are made and think, “I could make that…”
For example, maternity pants.
I have a hard time buying pants full price that I’m only going to wear for the next 4 months. So my solution… make my own!
I went to Goodwill and found some cute Gap pants that were my normal size. However, as you can see, they don’t fit so well around the waist.
After examining a pair of maternity pants I already own, I kinda figured out where to make my first cut.
I cut along this line, removing the entire waist of the pants. I also cut out the zipper and just hand sewed it shut.
At this point, I’m kind of laughing at myself. Did I just ruin a perfectly good pair of pants?? Good thing they were only $6.00.
Next step: I got stretchy knit fabric that coordinated with my pants. I cut a 34×16 strip of it. (I got this measurement simply by draping it around my waist to where it stretched but wasn’t super tight.) I folded it in half (longways), sewed it along the long edge to give me a 34×8 piece of fabric. After that, I sewed the short ends together to give me a circular piece.
I then pinned it to the outside of my pants and sewed it on!
It worked! The waist was a little big on me but I figured I’m not getting smaller anytime soon so bigger is better.
I was so excited that I did it with another pair of brown pants (from Goodwill of course) too. Check it out!
I also plan to make these pants into shorts when it starts to get warmer. I’ll also probably be frequenting the pants section of Goodwill a bit more now!
评论
楼主你太强了,向你学习,谢谢分享
评论
太强了,赞一个!
评论
DIY 精神值得赞扬,
怕费事买个这个吧,20块,啥裤子都能穿。

评论
要自己愿意花心思做事挺简单的,就是怕麻烦。。。在pumpkin patch买了一条弹力裤,正好有折扣,30刀也不算很贵。。
